How to Manage Site(s)?
This section helps you to manage the website(s) which makes the work as easy as launching it on Nestify. Nestify provides all the functionality to manage your launched website(s) at the production and staging phases with ease.
Production:
The production site is the live site that is visible to the end customers. Once you launch a new site on Nestify, the production site is created.
Staging:
The staging site is essential to make and test any requisite changes before pushing it to the live or production site. A staging site is a copy of the production site. Changes done can be copied to the production site or vice versa.
How to See your Staging or Production Site?
Steps:
- Click on Manage Sites on the left panel.
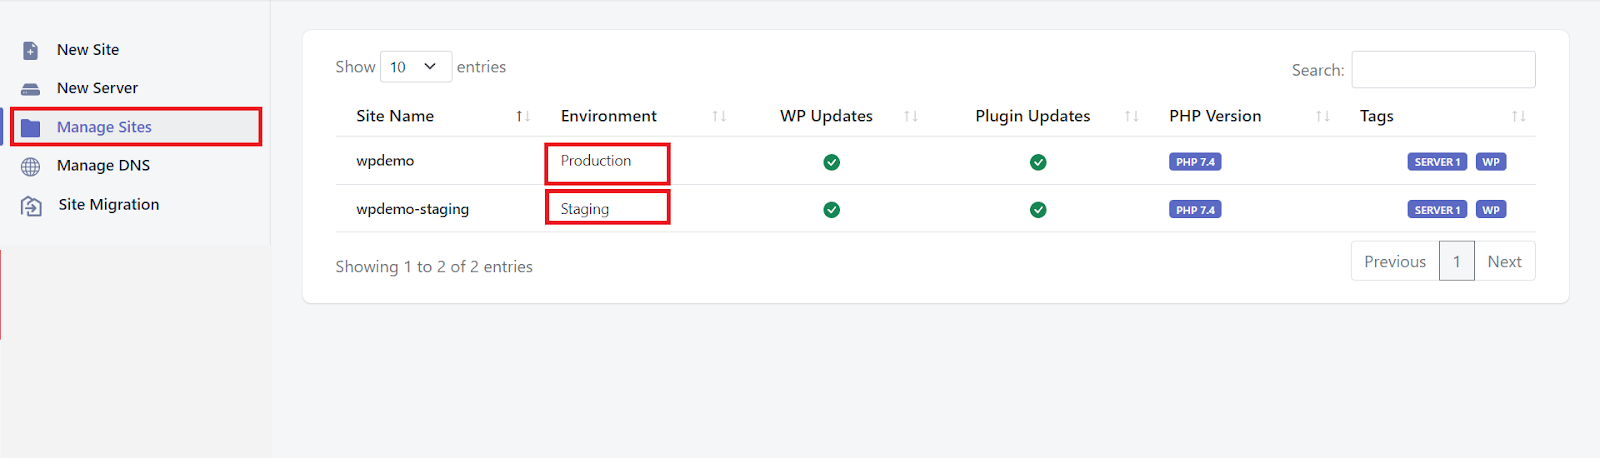
- Click on production or staging, it will redirect you to the dashboard
How to Switch the PHP Version Using Components?
This section helps you to switch to the previous version of PHP. By default, the PHP version is set to the latest one, you may however update the PHP version production and/or staging site.
Steps:
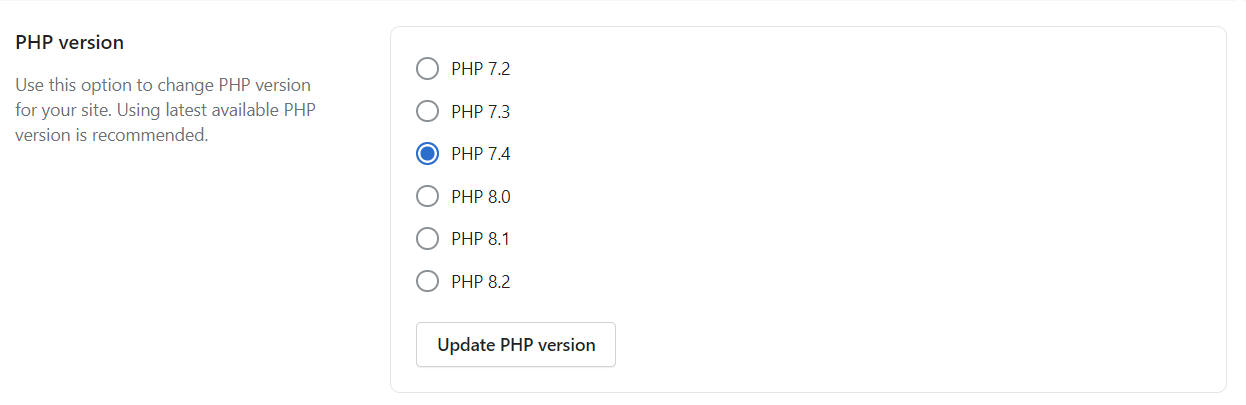
1. In the Manage Sites section, click on settings. It displays the PHP versions available.
2. Select the requisite version of PHP
3. Click on Update PHP Version
It updates the site to be compatible with the selected PHP version.

How to Understand WordPress Dashboard on Nestify?
This section helps you to understand the site dashboard that shows all the details and credentials related to the launched site, both for production and staging sites. On the WordPress section, you can view the following:
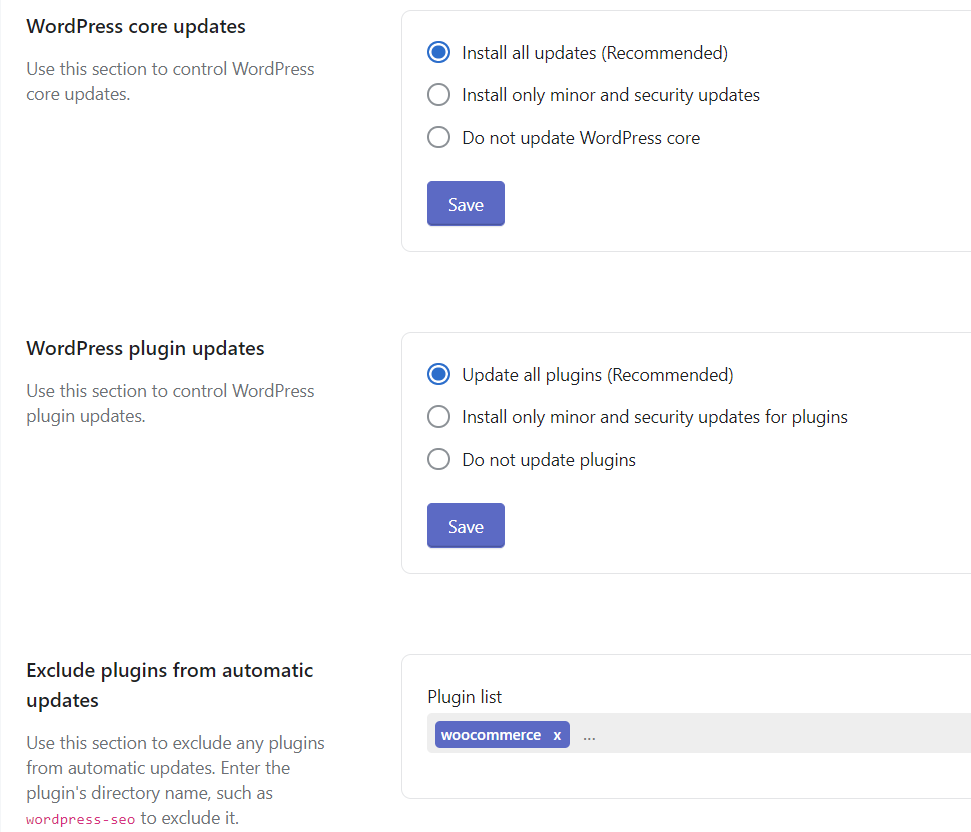
• WordPress Updates: Nestify’s automatic WordPress core updates keeps your site protected without lifting a finger. If you want to pause the update during maintenance or any other installation, click on ‘Defer WordPress Update.’
• WordPress Info: It gives information related to recent versions of WordPress and plugins installed on your site. This information is updated automatically every 24 hours.
You can specifically control these updates by scrolling down and selecting the desired option.
How to Opt for Pagespeed Optimization?
Nestify’s dashboard offers a comprehensive Pagespeed Optimization section, empowering users to enhance website performance for optimal user experience. Additionally, the CloudFront CDN and DDoS Shield section provides robust security measures and accelerated content delivery, ensuring websites remain resilient against cyber threats while delivering content efficiently. You can deactivate Pagespeed Optimization with just a click.
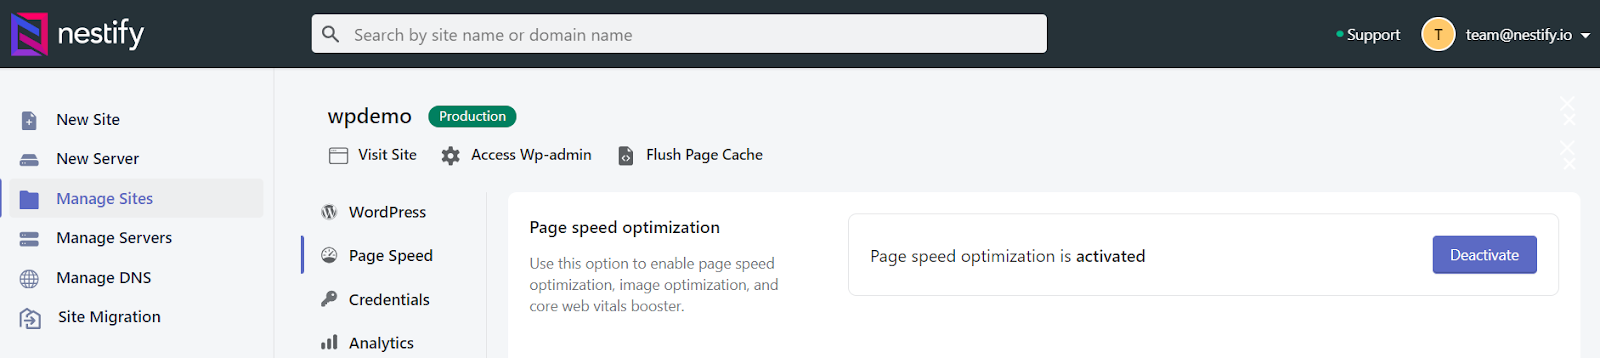
If you are using Nestify nameservers, you just need to click on the enable button to activate the CDN and DDoS facility. The details obtained are:

How to Get the Credentials of your Site?
This section helps you to understand the site dashboard that shows all the credentials related to the launched site, both for production and staging sites. On the WordPress section, you can view the following:
• Site tags: This section indicates the tags used for grouping sites, searching, and API reference purposes. You may add extra relevant tags.
• Site Information: This section includes WordPress admin credentials (username, password), SSH/SFTP host and login details, and database host name and login details.
• Password Protection: This section includes the function to enable password protection.
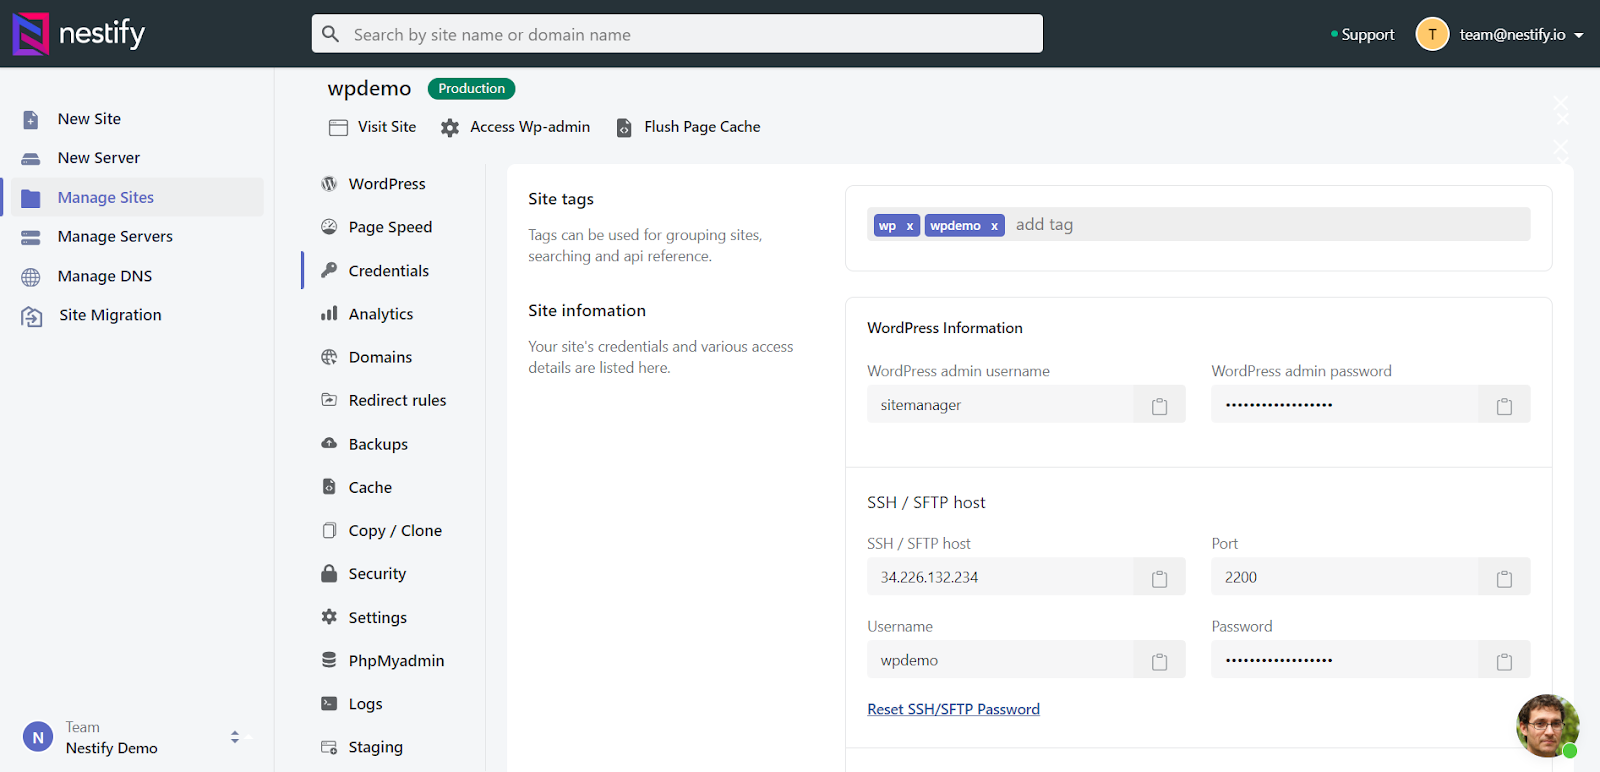
Production site overview

Staging site overview
How to Configure SFTP?
This section helps you to configure the SFTP (Secure File Transfer Protocol) either for the production site or staging site or for both, through the SFTP client.
The secure shell encryption used by SFTP ensures that your data is safe while it is being sent or received. FileZilla is used as the SFTP client here for instance purposes. You may use any SFTP client.
Steps:
1. In the Manage sites on left panel, go to production/staging site and click on Credentials
2. From the credential details in the right side of the screen, copy/note the SSH/SFTP password.
3. Open FileZilla on your browser. Download it.

4. It will ask you to type administrator password. Type the password of SFTP that you copied from the dashboard.

5. Type the same STFP password in the connection box.
6. On the next dialog box, click the requisite option to Remember passwords and automatically connect to this server.
7. Click Ok
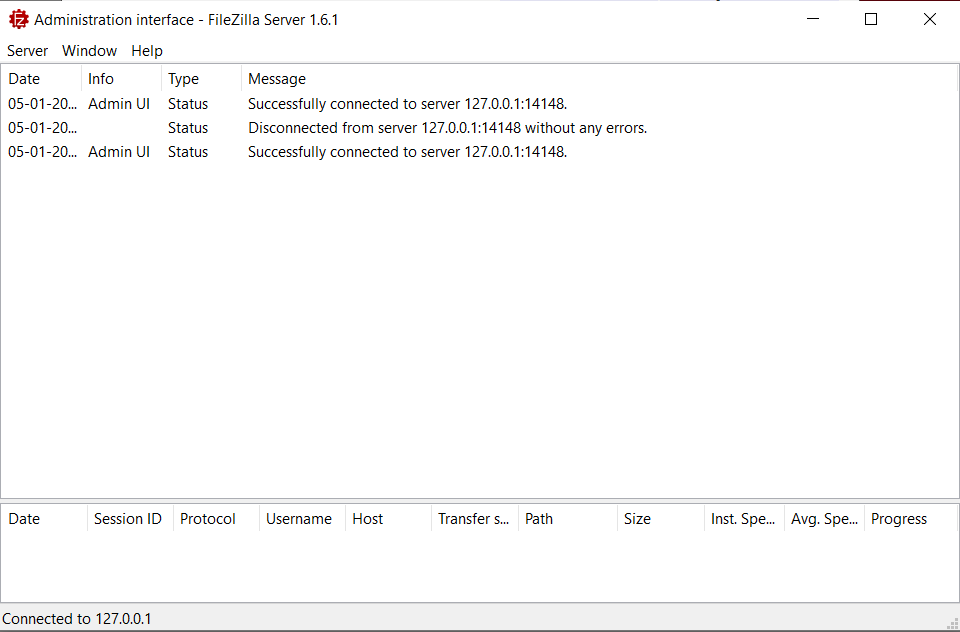
It establishes a connection. You can see your site content in your SFTP Client.
How to Reset SSH/SFTP Password?
This section helps you to reset the SSH/SFTP password to a new password, either for the production site or staging site or both.
Steps:
1. Click on Manage Sites on the left panel.
2. In the production/staging site, click on Credentials
3. From the credential details, under Site Information, click on Reset SSH/SFTP Password
4. In the confirmation dialog box, click on Reset Password
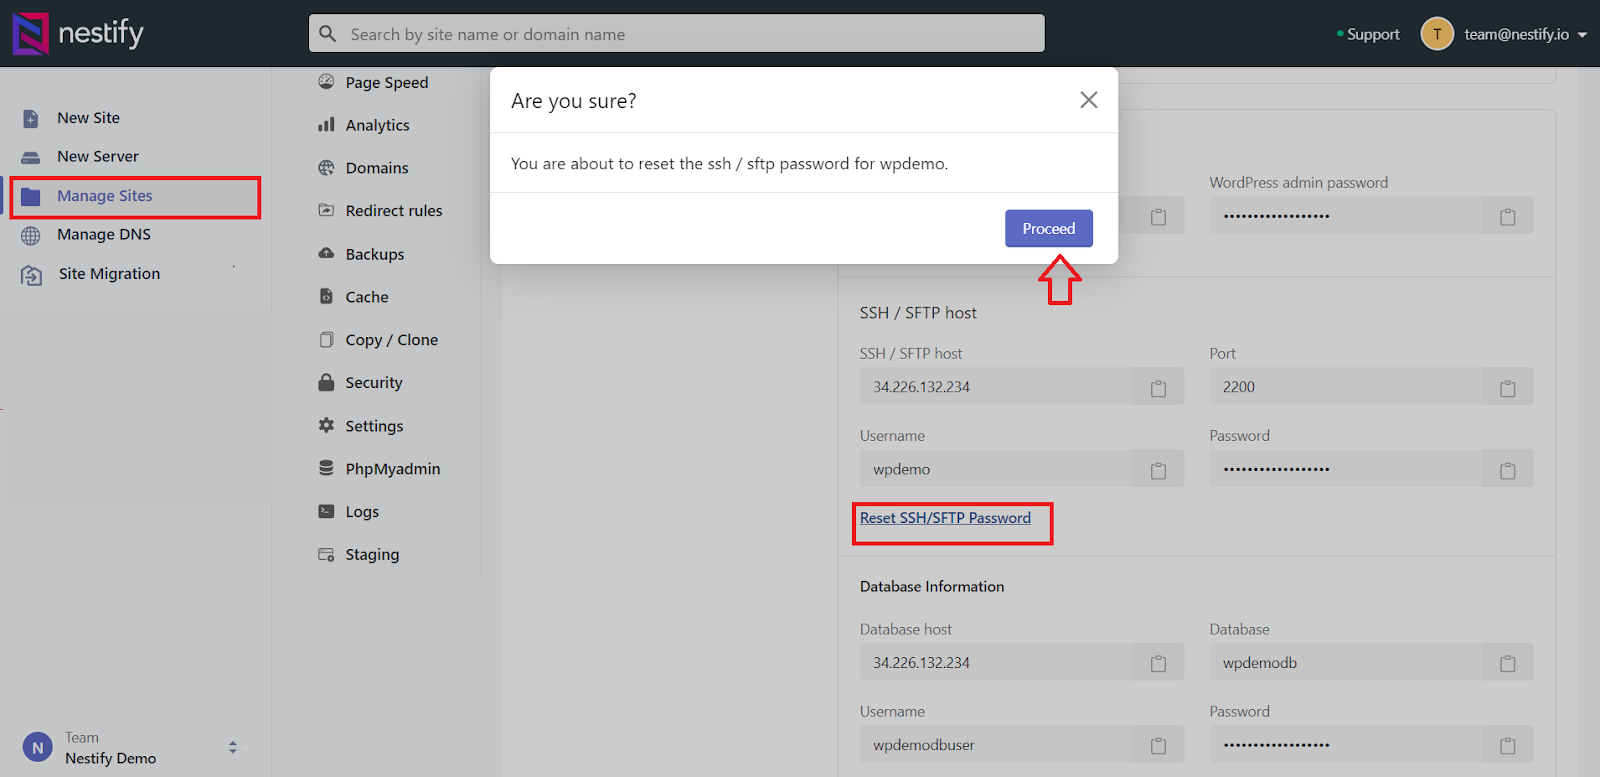
The password is reset to a new value, and it reflects the same in the credential details.
How to Enable Password Protection?
This section helps you to enable password protection for your existing websites on Nestify. Password protection is a crucial function that is essential to block traffic from search engines to the sites (production/staging). It is useful to restrict public access during site development or when access needs to be given to authentic users only.
Steps:
- Click on Manage Sites on the left panel.
- In the production/staging site, click on Credentials.
- From the credential details, under the Password Protection section, click on Enable Password Protection.

It enables a password protection facility and turns the status “On”. It displays the username and password credentials. Password protection can be disabled anytime, by clicking on Disable Password Protection.
How to Get the Analytics of a Site?
This section helps you to get analytics of your website hosted on Nestify. Analytics of a website is essential to understand the number of visits happening to the site and the rate of performance as well. Analytics gives a key understanding for taking site development or site enhancement related decisions. The Analytics displays the following:
• Total pageviews
• Request served by the CDN
• Request served by the origin
• WAF Events
• Bandwidth usage report
Steps:
1. Click on Manage Sites on the left panel
2. In the production/staging site, click on Analytics on the dashboard

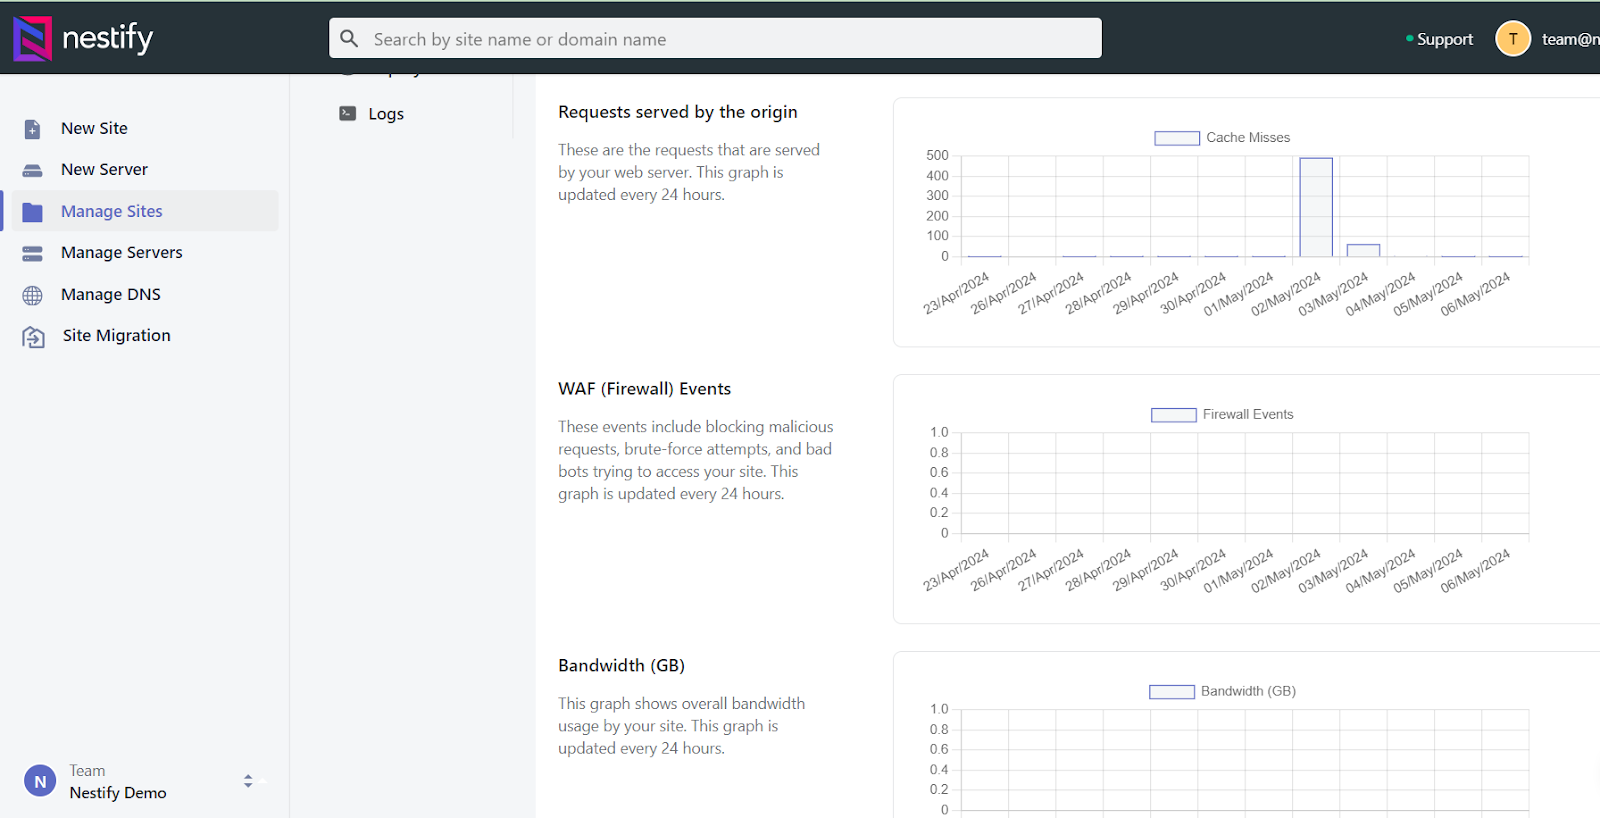
The details of analytics are displayed on the right side of the screen.
How to Add Redirect Rules to the Site?
This section helps you to add redirect rules to your site(s). In case you wish to point the previous URL to a new page, it is essential to set the redirect rules. When the previous/old URL is typed in, it redirects the customer to a new page without giving an error message. This improves the customer experience for the website visit.
You can add a redirect rule for the production/staging site to automatically redirect the customer to the required webpage.
Steps:
1. Click on Manage Sites on the left panel.
2. Click on production or staging, click the Redirect rules section on the dashboard
It displays the details of adding a new redirect rule.
2. Select the Domain to which you need to add a new redirect rule
3. Enter the URL in the Source, that needs a redirection
4. Enter the URL in the Destination, that needs to be redirected to
5. Select the Redirect Type:
• 301: For permanent redirection, when the webpage is permanently moved to a new address. Another advantage of the 301 Redirect is that it does not hamper the SEO.
• 302: For temporary redirection, when the webpage need not be transferred to a new address permanently. It is useful to select this option during website maintenance.
• break
6. Click on Save
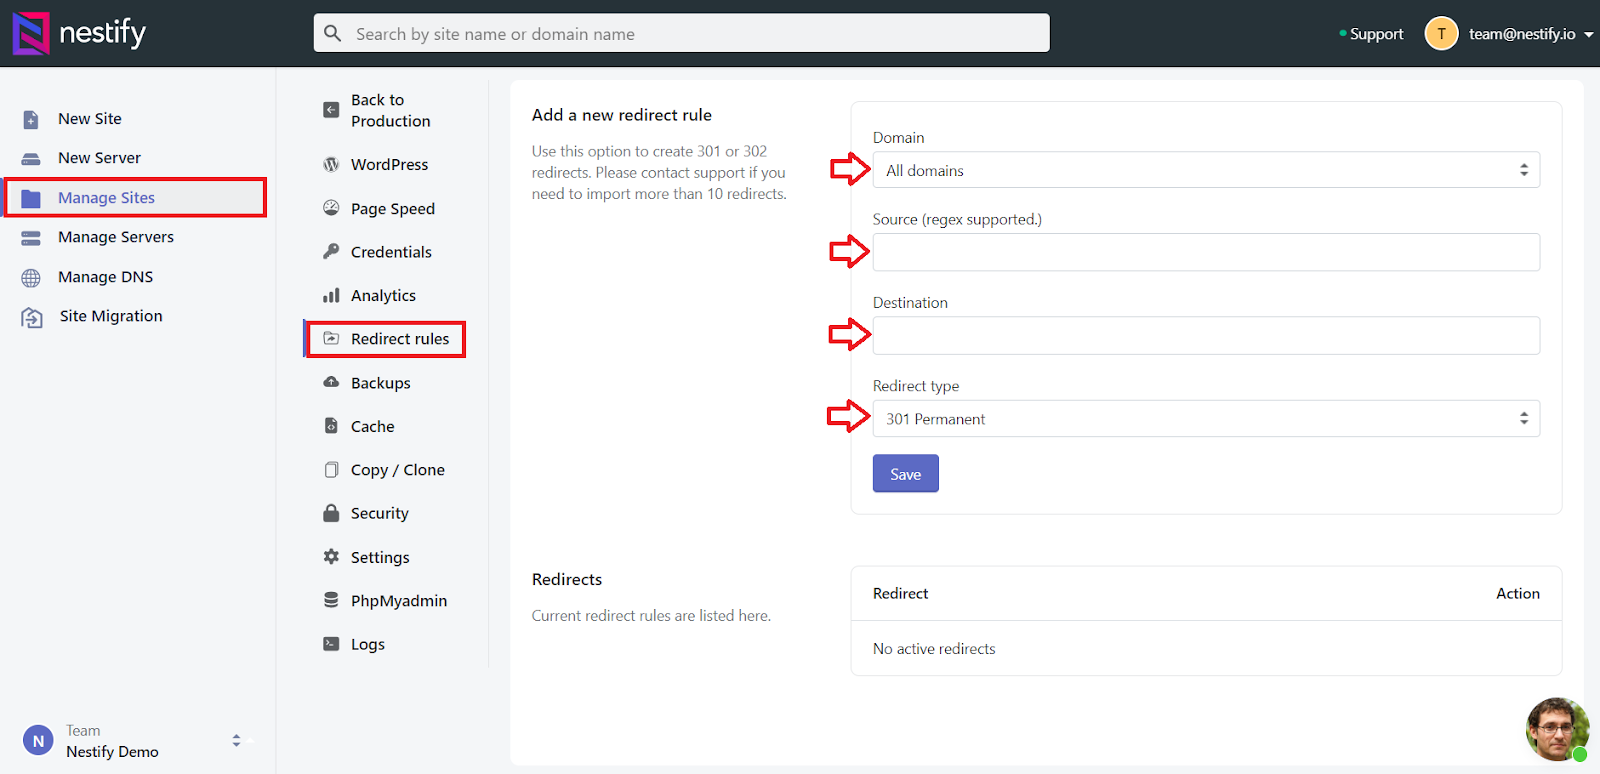
It displays the redirect details in the Redirect section. The redirects can be later deleted if required.
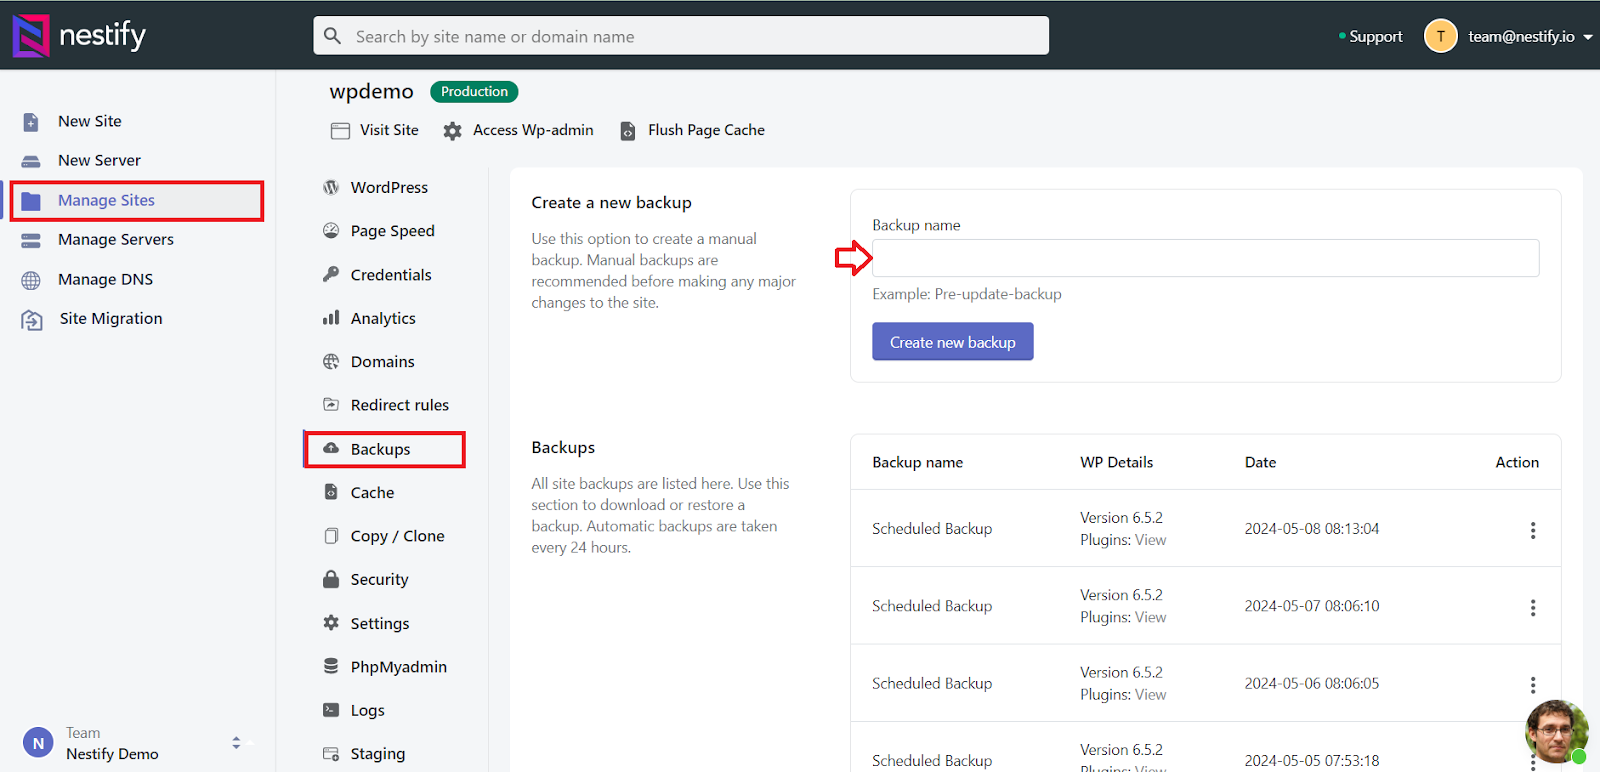
How to Take Backups of the Site?
This section helps you to take backups of your website(s) hosted on Nestify. Nestify provides daily backups, which is one of the top essential aspects of the website. Whenever any major changes are done on your website and you need to save those changes or take a manual backup, then instead of waiting for a scheduled backup, you may perform the manual backup.
The copy of the backup of the filesystem and database is stored on Amazon S3. An Nginx config is also backed up, thus in case of complete data loss (in case of deleted data, file crash, etc.), it can restore the site completely.
Steps:
1. Click on Manage Sites on the left panel.
2. In the production/staging site, click on Backups
3. Enter a name for the backup
4. A new section of Backups is created with the backup details below.
Once the backup is created, it displays four options:
• Download
• Restore
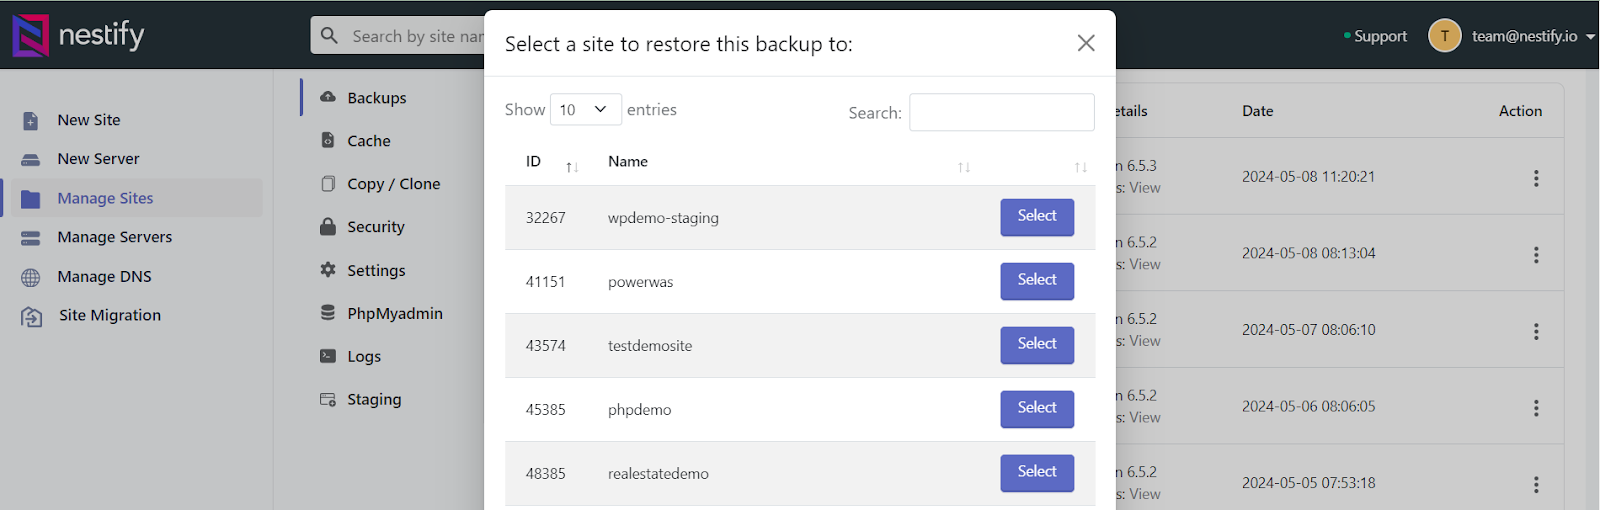
• Restore to another site
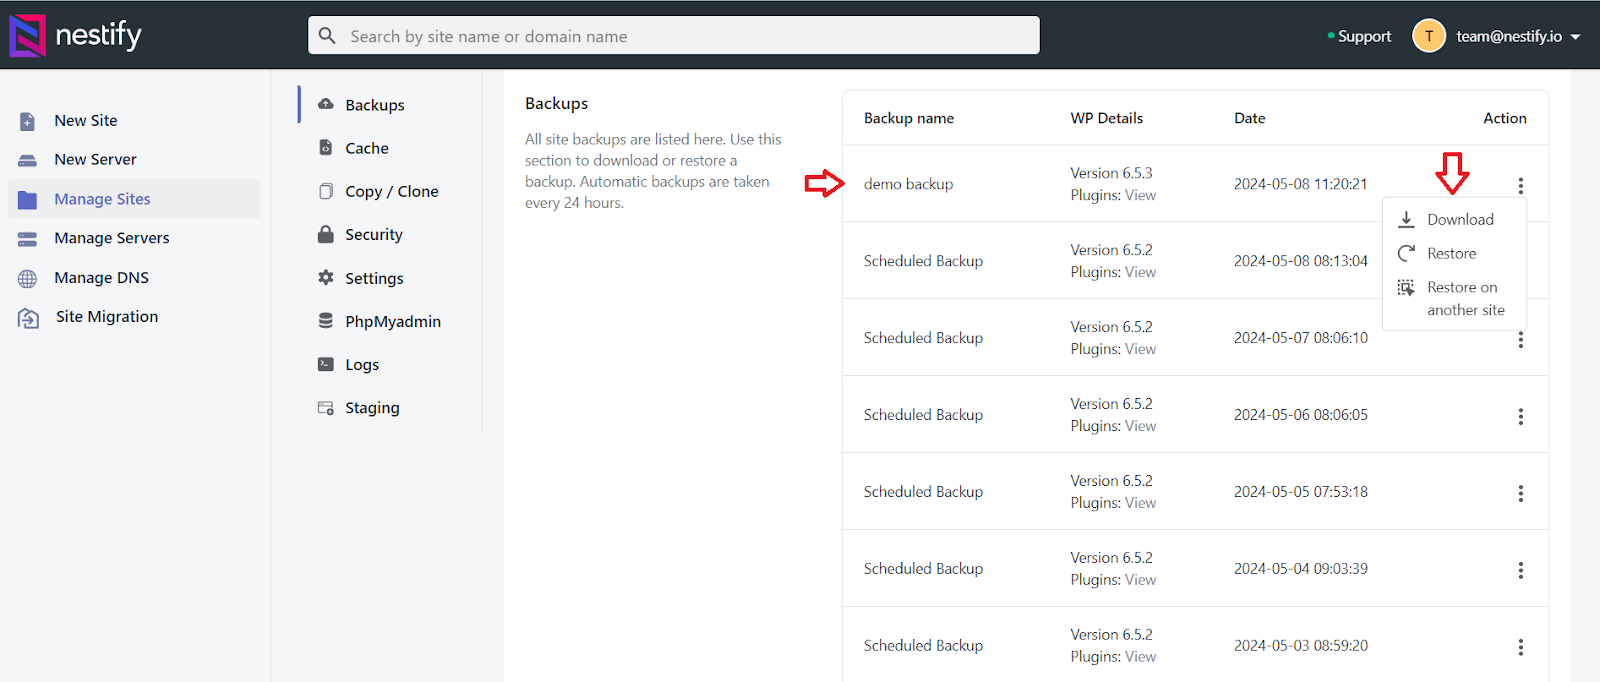
7. Click the requisite option to perform the following actions:
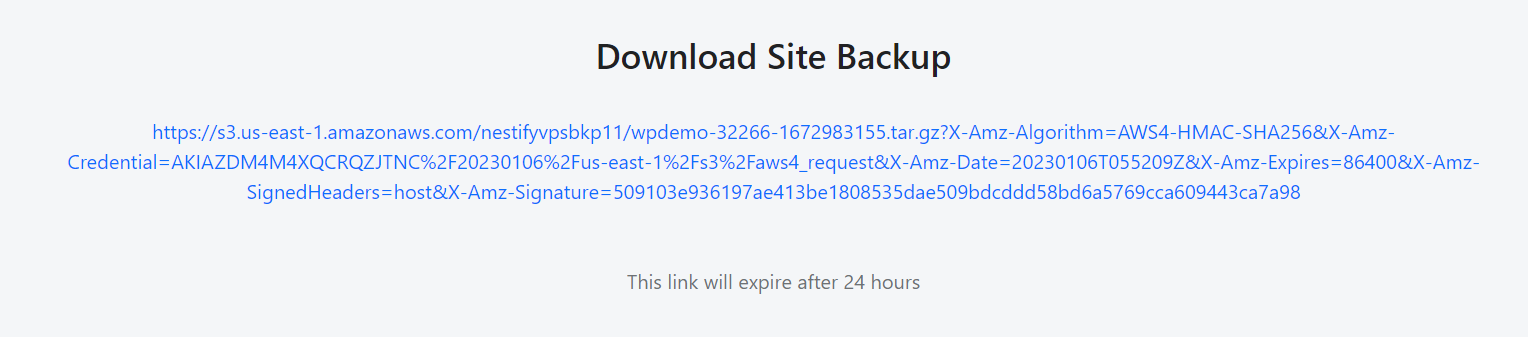
• Download: It downloads the backup by providing the backup link, valid for 24 hours
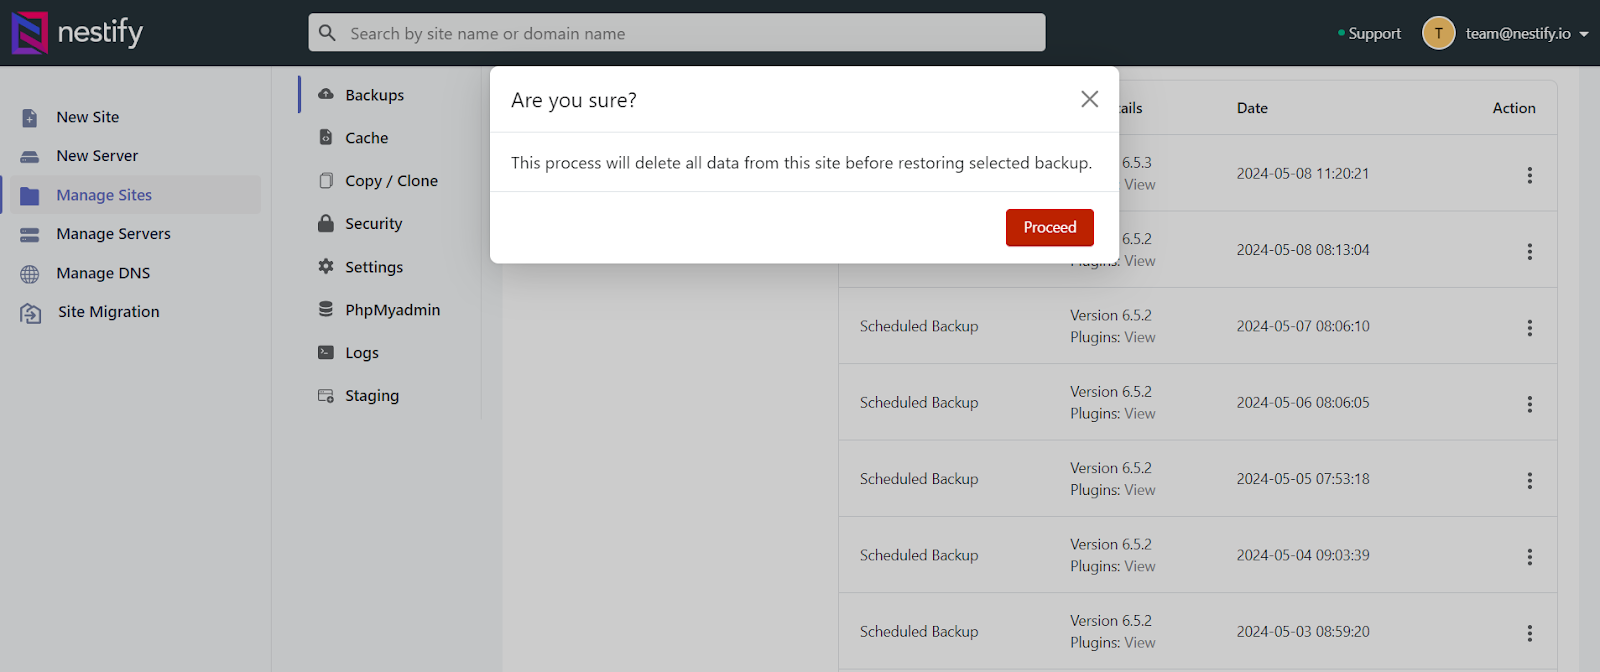
• Restore on the same site: It overwrites the contents of the site with the backup data. Proceed with this step if you are very sure to restore, as restoring is an irreversible process
• Restore on another site: It restores the backup on another site. You may select the requisite site to restore the backup on.
How to Check the Cache Status?
This section helps you to check the cache status of your website(s) hosted on Nestify. The cache is useful for running web pages faster and smoother. Sometimes, it may even cause issues if there is a content loading problem. You can easily change cache settings for production as well as a staging site.
Steps:
1. Click on Manage Sites on the left panel.
2. In the production/staging site, click on the overview
3. Click on Cache on the panel
It displays the details of the cache setting

4. To change the cache settings for Full Page Cache Status, select the requisite option

5. To Change the cache settings for Browser Cache Status, select the requisite option

You can toggle between Activate/Deactivate
6. To Add New Cache Exclusion, select the Exclusion Type
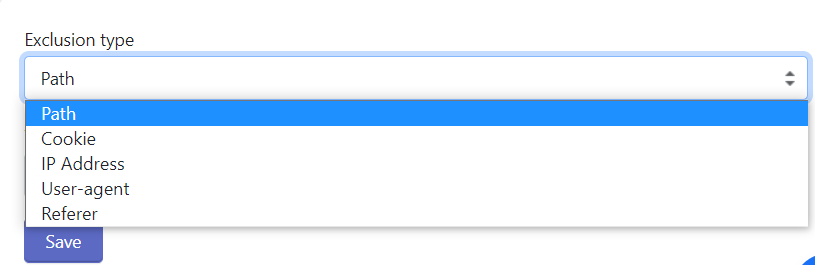
Select the path you want to take
7. Enter the value in ‘Value Contains’
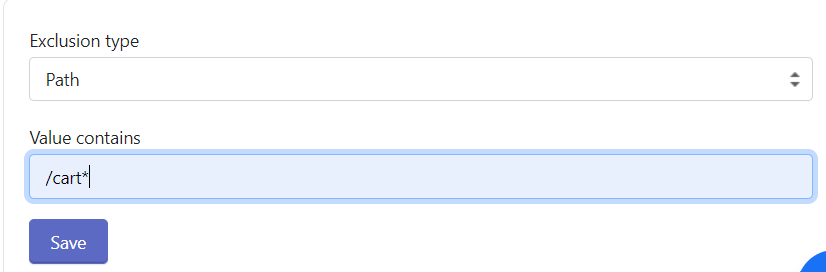
8. Click Save

New cache exclusion is created and displayed. You may delete it later if required.
How to Push/Pull Data from Staging Site?
This section offers a solution that effectively preserves the data that you are worried about losing while working on production sites from the live site (orders, comments, etc.). You can save this data using the copy/clone option.
Steps:
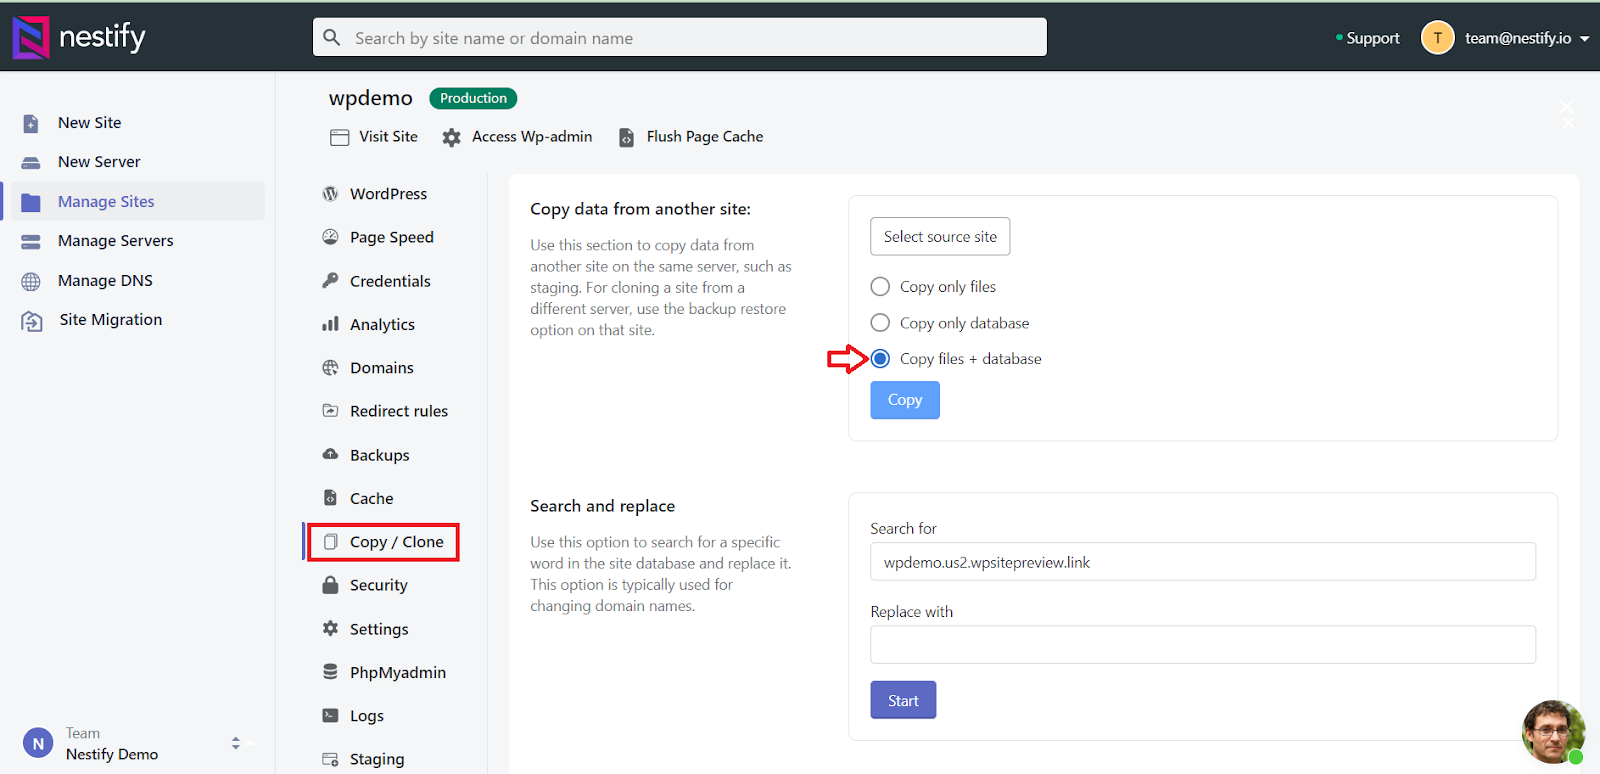
1. In the production site, click on overview and then on the Copy/Clone option on its panel.
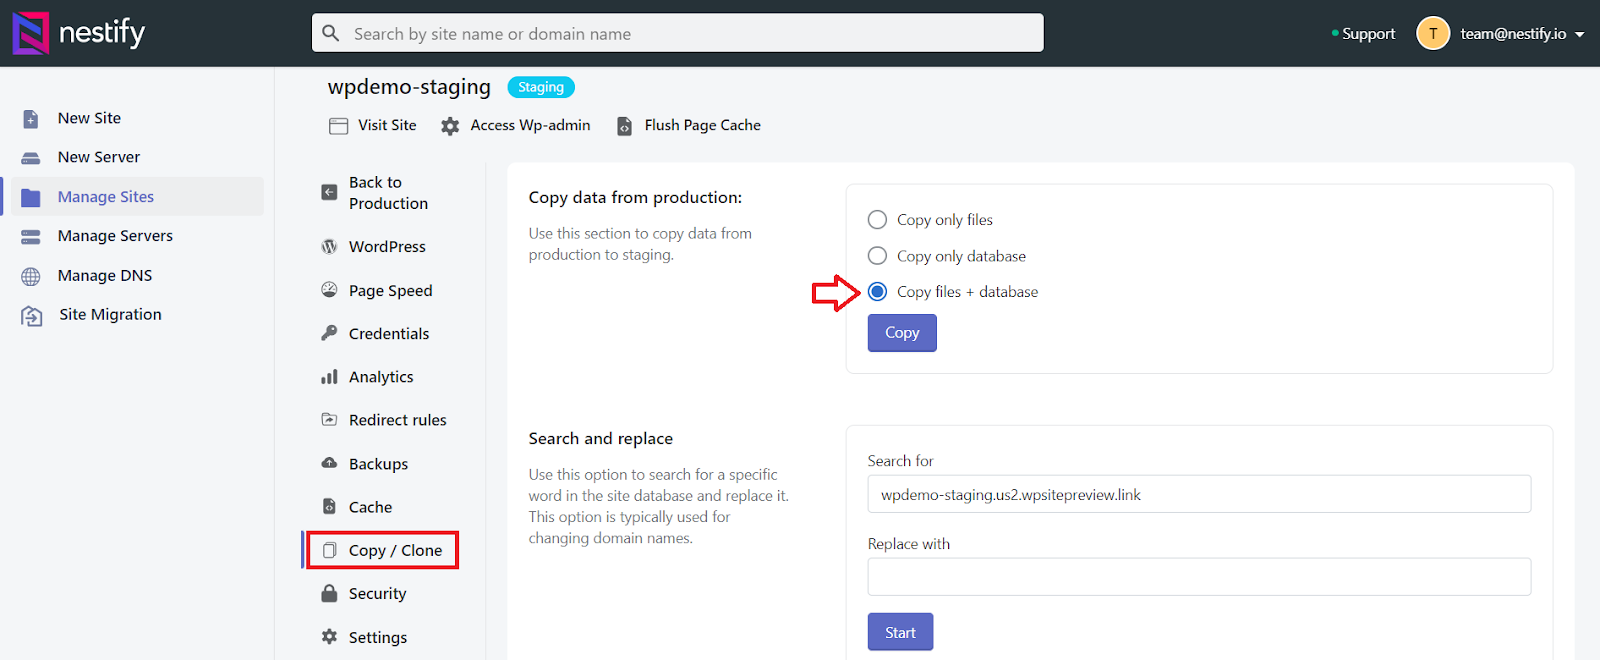
2. Select the requisite option
• Copy only files
• Copy only database
• Copy files+database
3. Click on Copy
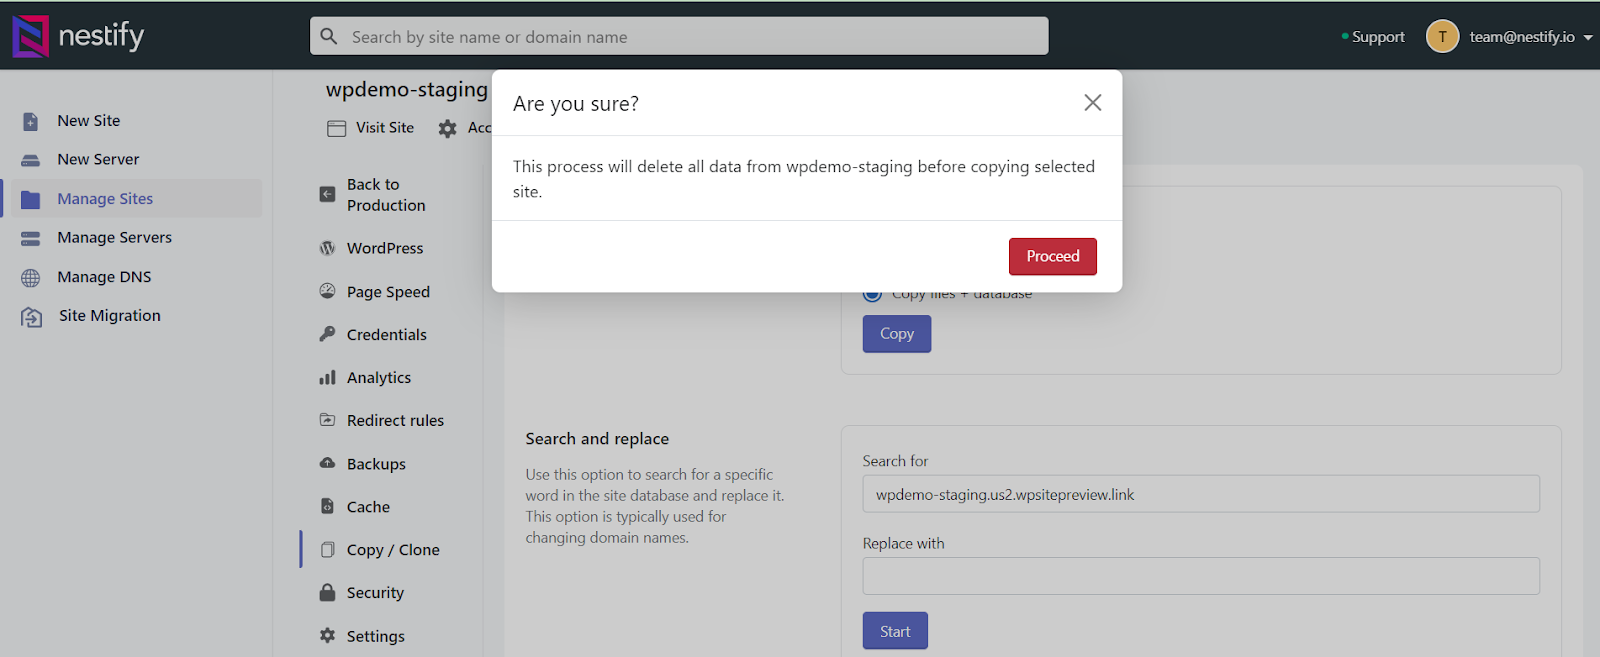
4. If you are sure to copy, click Proceed on the confirmation dialog box.
The processing starts. The screen locks until the push/pull operation is complete. Once the processing is complete, you can see your content in the production environment.
How to Push/Pull Data from Production Site?
This section offers a solution that effectively preserves the data that you are worried about losing while working on staging sites from the live site (orders, comments, etc.). You can save this data using the copy/clone option.
Steps:
- Click on Manage Sites on the left panel
- In the staging site, click on overview and then on the Copy/Clone option on its panel.
It displays the details on the right side of the screen
3. Select the requisite option
• Copy only files
• Copy only database
• Copy files+database
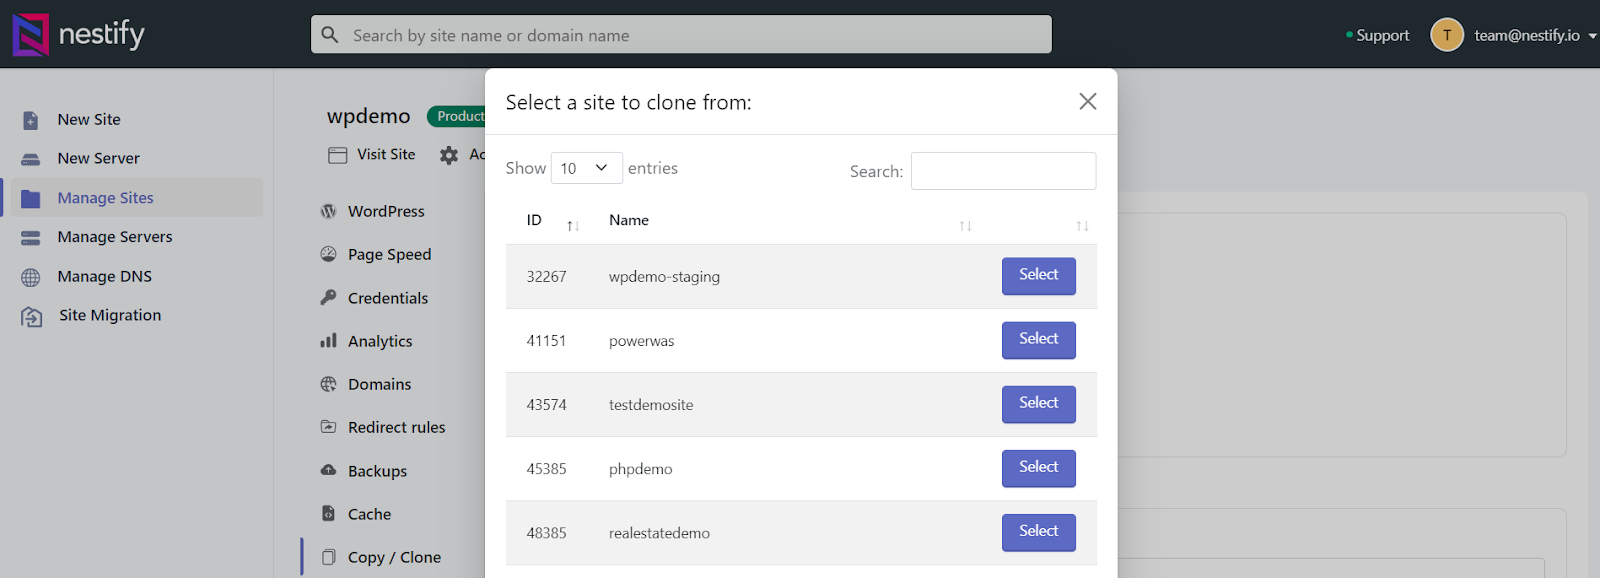
4. Select source.
5. If you are sure to copy, click Proceed on the confirmation dialog box.
The processing starts. The screen locks until the push/pull operation is complete. Once the processing is complete, you can see your content in the staging environment.
How to Search and Replace Data from a Database?
This section allows you to search and replace a word or a domain name of the website(s) hosted on Nestify.
Steps:
1. On Nestify hosting dashboard, click on Manage sites
You can see the list of all the site names on the screen.
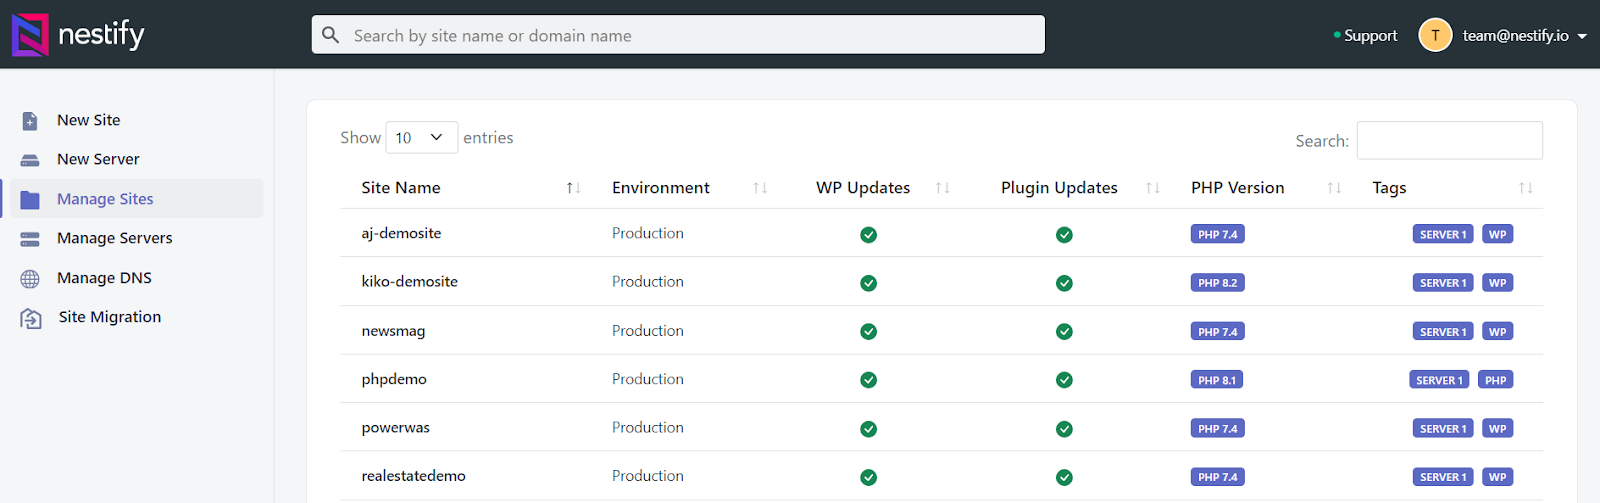
2. Click on the site which you want to replace. If you can’t find any site name on the first page, just type in the search box on the right corner to find it.
3. After clicking on the site, it navigates you to the dashboard where you have to locate the copy/clone section.
4. Enter the name of the name of the site you want to replace it with the site name/domain name you want to replace it with.
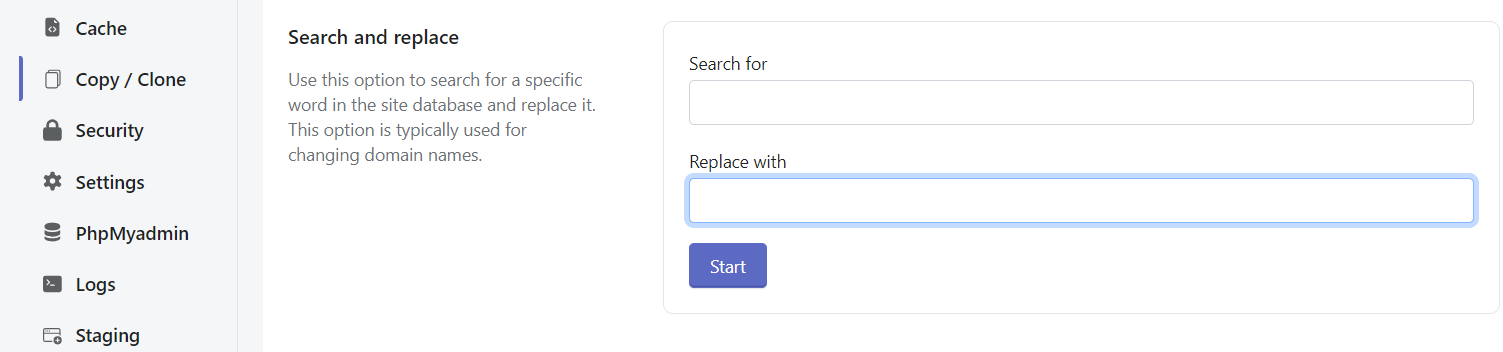
5. Click on start.
The replacement process will begin.
How to Secure your Website from Threats using the Security Option?
This section allows you to allow or restrict access sharing to servers or IP addresses. It also offers malware cleanup by restoring WordPress core files to their original state.
Steps:
- In Nestify hosting dashboard, click on Manage sites
- In the production/staging site, click on overview and then select Security. It displays the details on the right side of the screen.
- If you want to restrict wp-admin access, type the IP address in the empty box. Then click on Save.
- If you want to allow wp-admin access to specific IP addresses, fill in the details.

- If you want malware cleanup, click on begin.
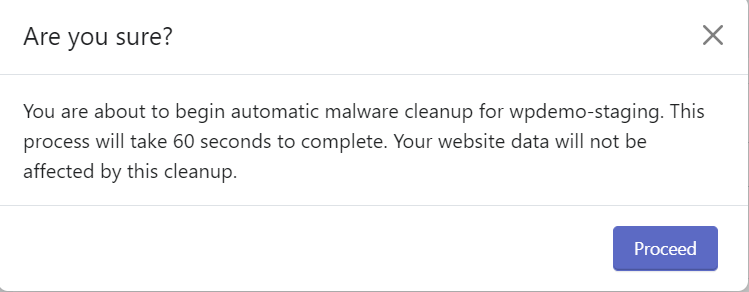
The process will take a few minutes to clean, restore, and secure your site.
How to Learn More about Settings of Your Website?
The basic settings of your website, like updating PHP versions, resetting file permissions, restarting web services on your website, and deleting a particular site, is a one-click process on Nestify.
Steps:
1. In Nestify hosting dashboard, click on Manage sites
2. In the production/staging site, click on overview and then select Settings. It displays the setting details on the right side of the screen.
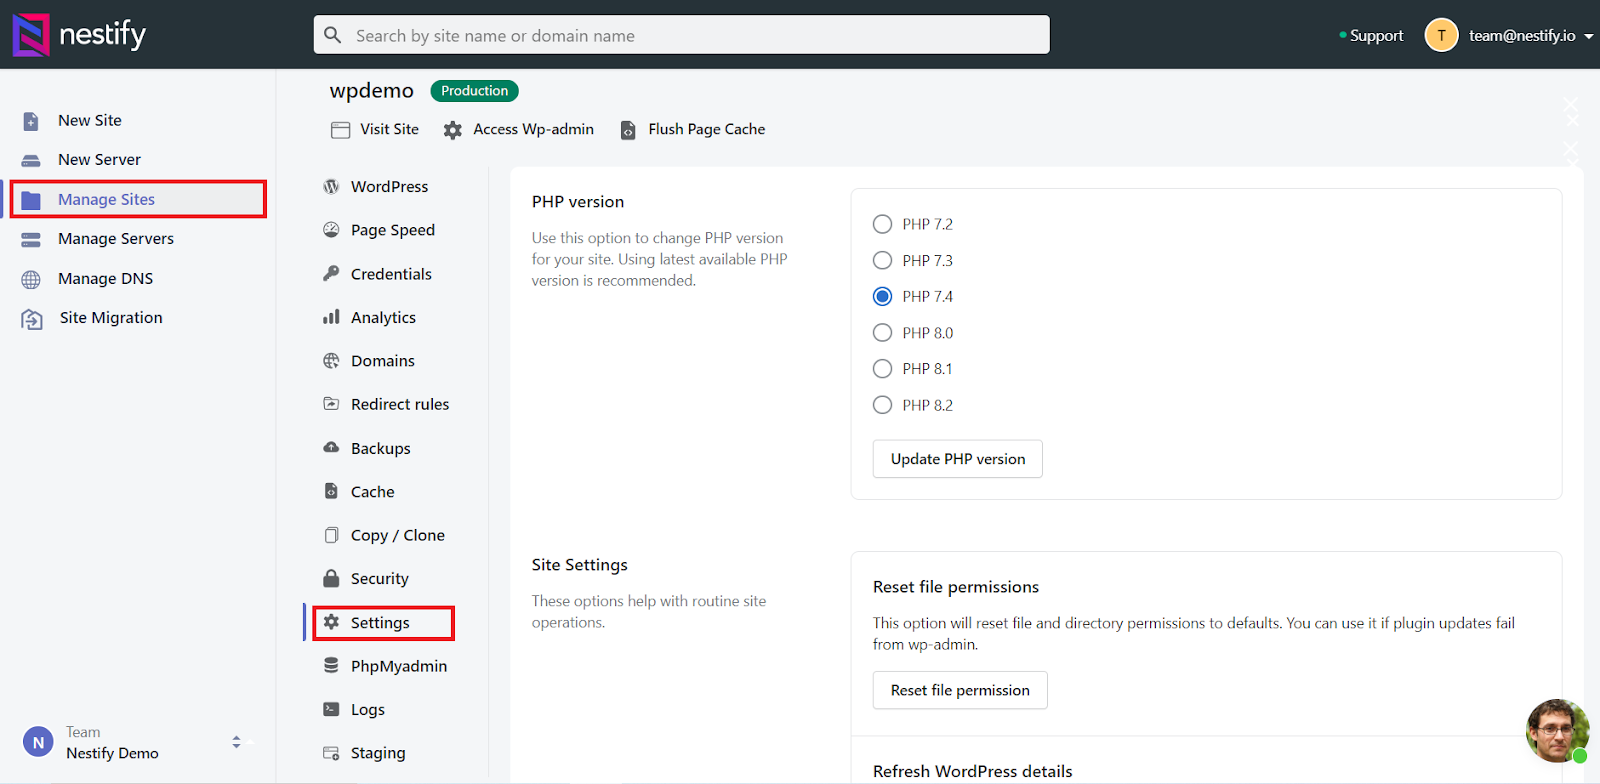
3. If you want to upgrade the PHP version of the website, select the version you want it to be upgraded. Then click on the Update PHP version.
4. If you need to reset the current file permissions under the site settings section, click Reset File Permissions.
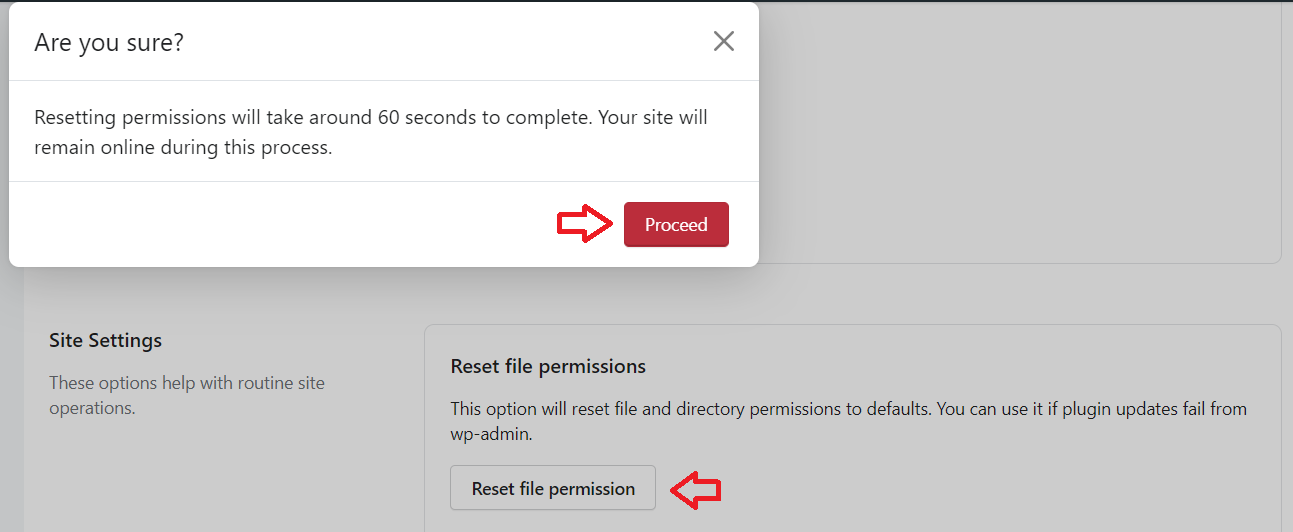
This will start resetting the process and let the directory permissions set to default.
5. If you want to restart web services, click on the requisite option.
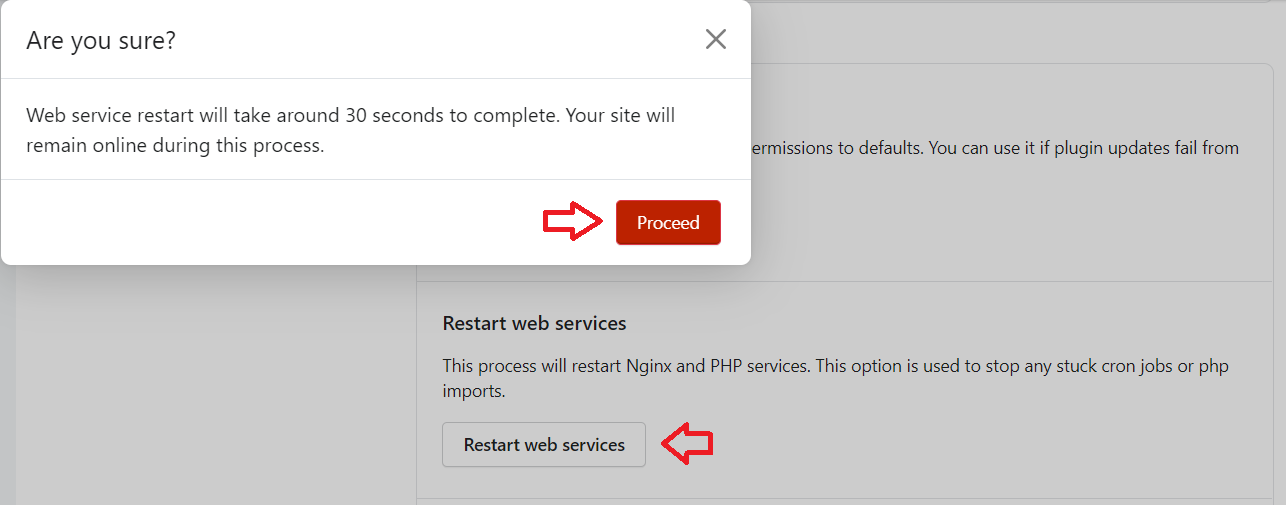
The system will restart Nginx and PHP services for your website(s).
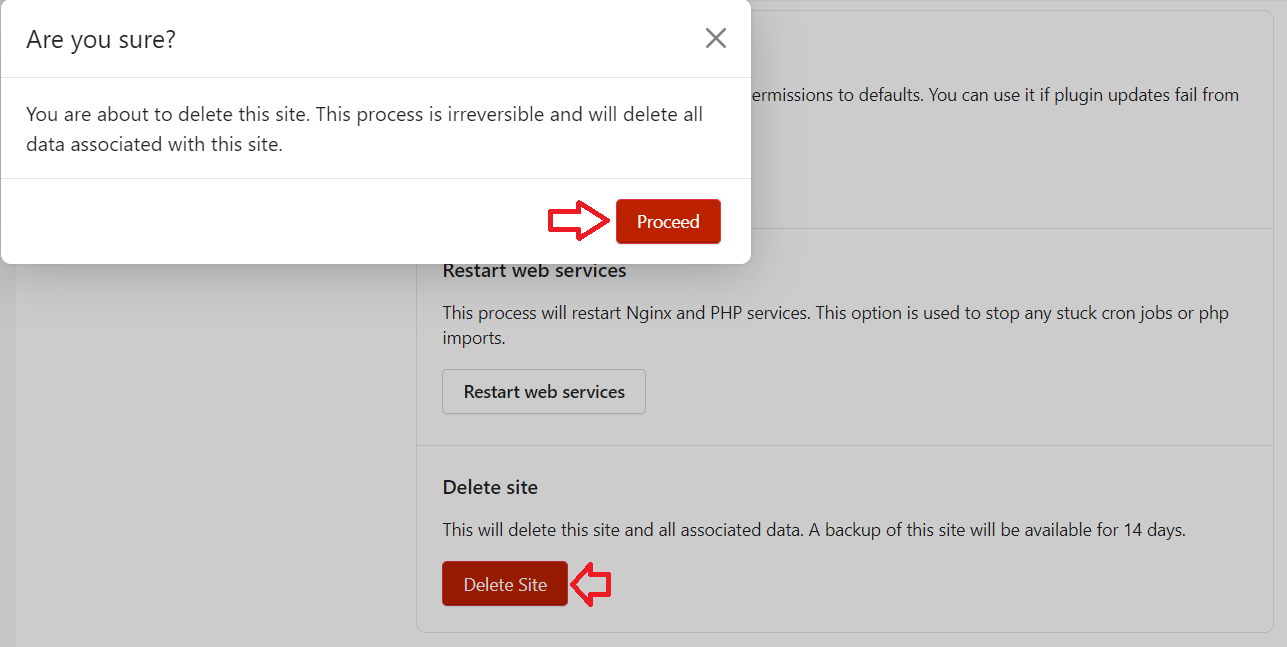
6. If you need to delete the site, click on Delete Site. If you are sure to delete the site, click Proceed on the confirmation dialog box.
How to Access PhpMyAdmin Panel?
This section allows you to access the phpMyAdmin for managing the database of the website hosted on Nestify.
Steps:
- Click on Manage Sites on the left panel.

- Click on production or staging, it will redirect you to the dashboard
It displays the site details on the screen. The database credentials are under the “Site
Information” section.
- Copy the credentials of username and password of Database information.
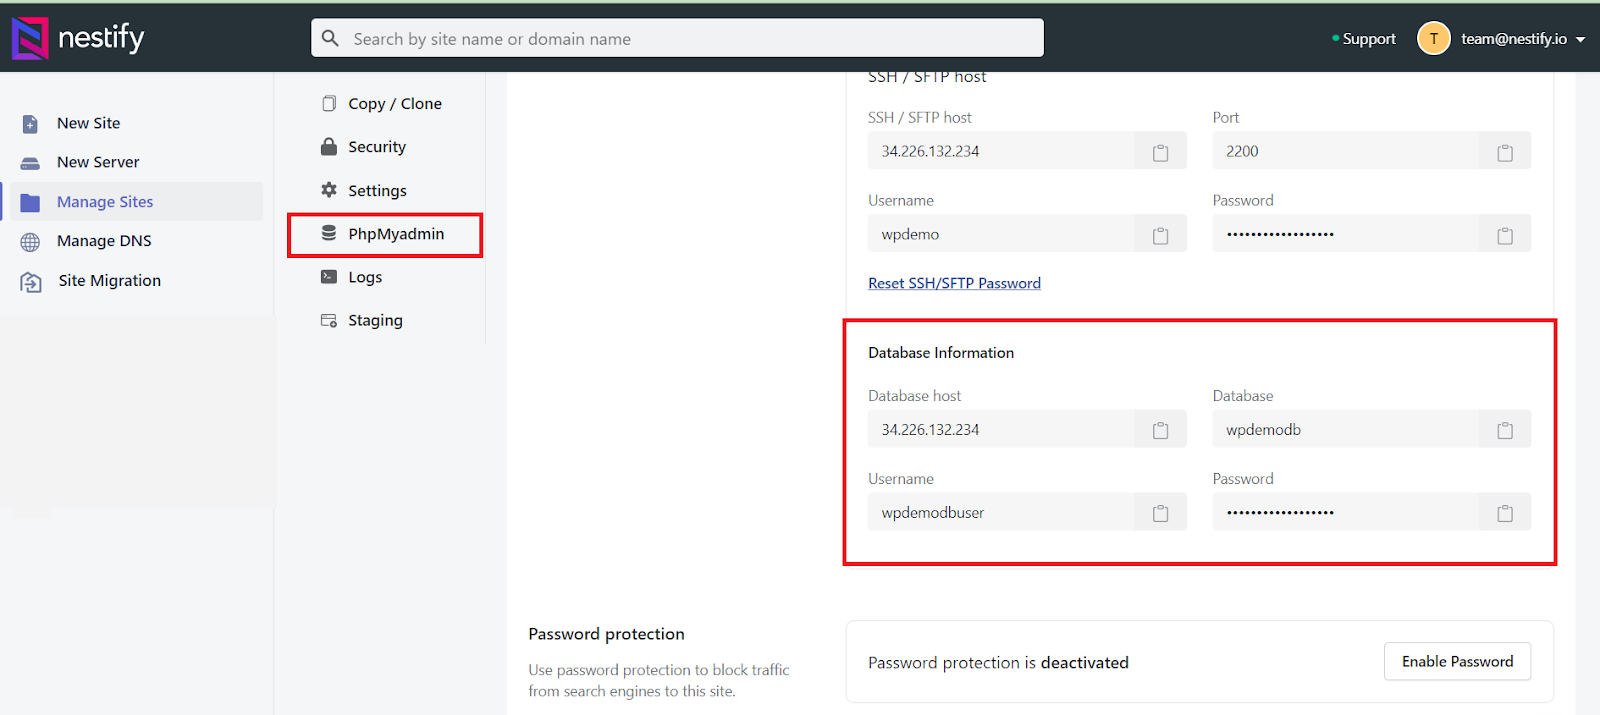
- In the production site, click phpMyAdmin.
It redirects you to the phpMyAdmin login.
- Enter the credentials of username and password that you copied.
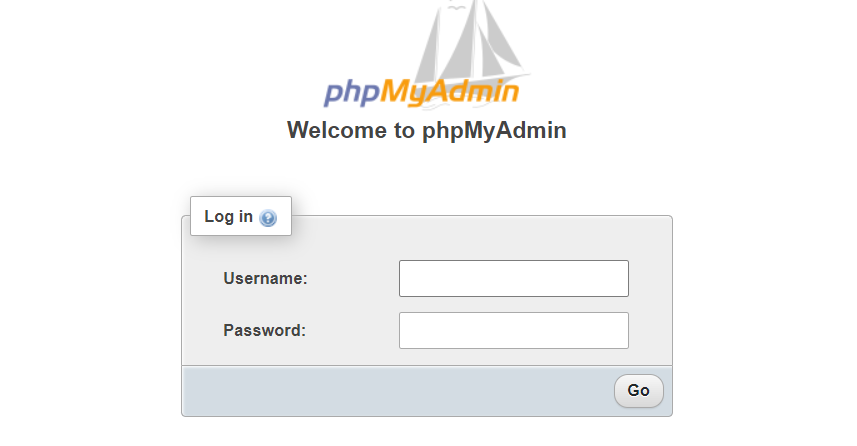
6. Click on Go.
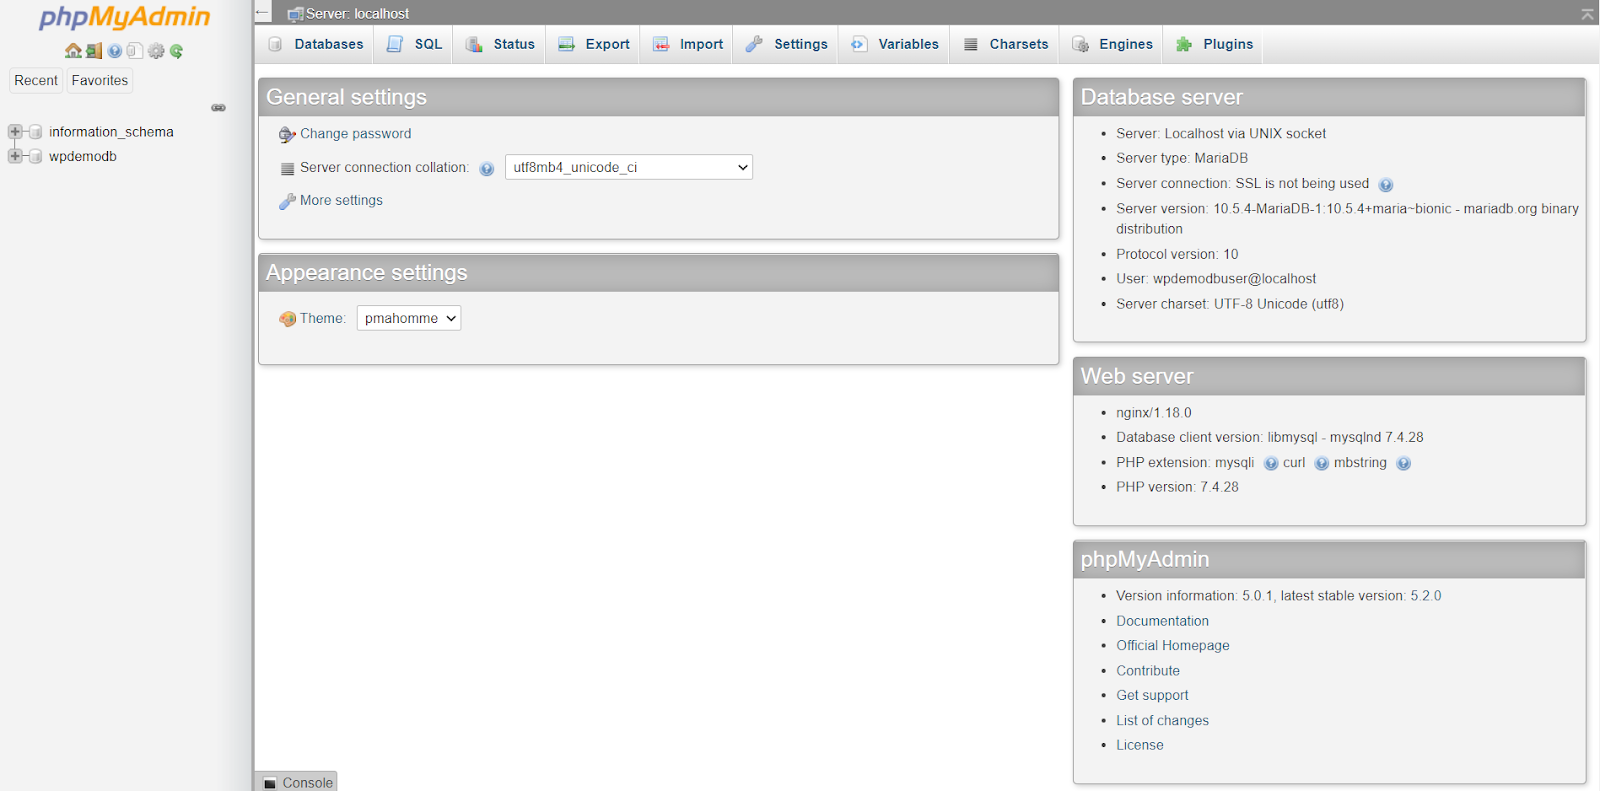
It logs you into the phpMyAdmin dashboard.
How to View Logs?
This section helps you to view Logs of your website(s) which have been hosted on Nestify. Logs are essential components to understand the details regarding accessibility and errors that occur in a website.
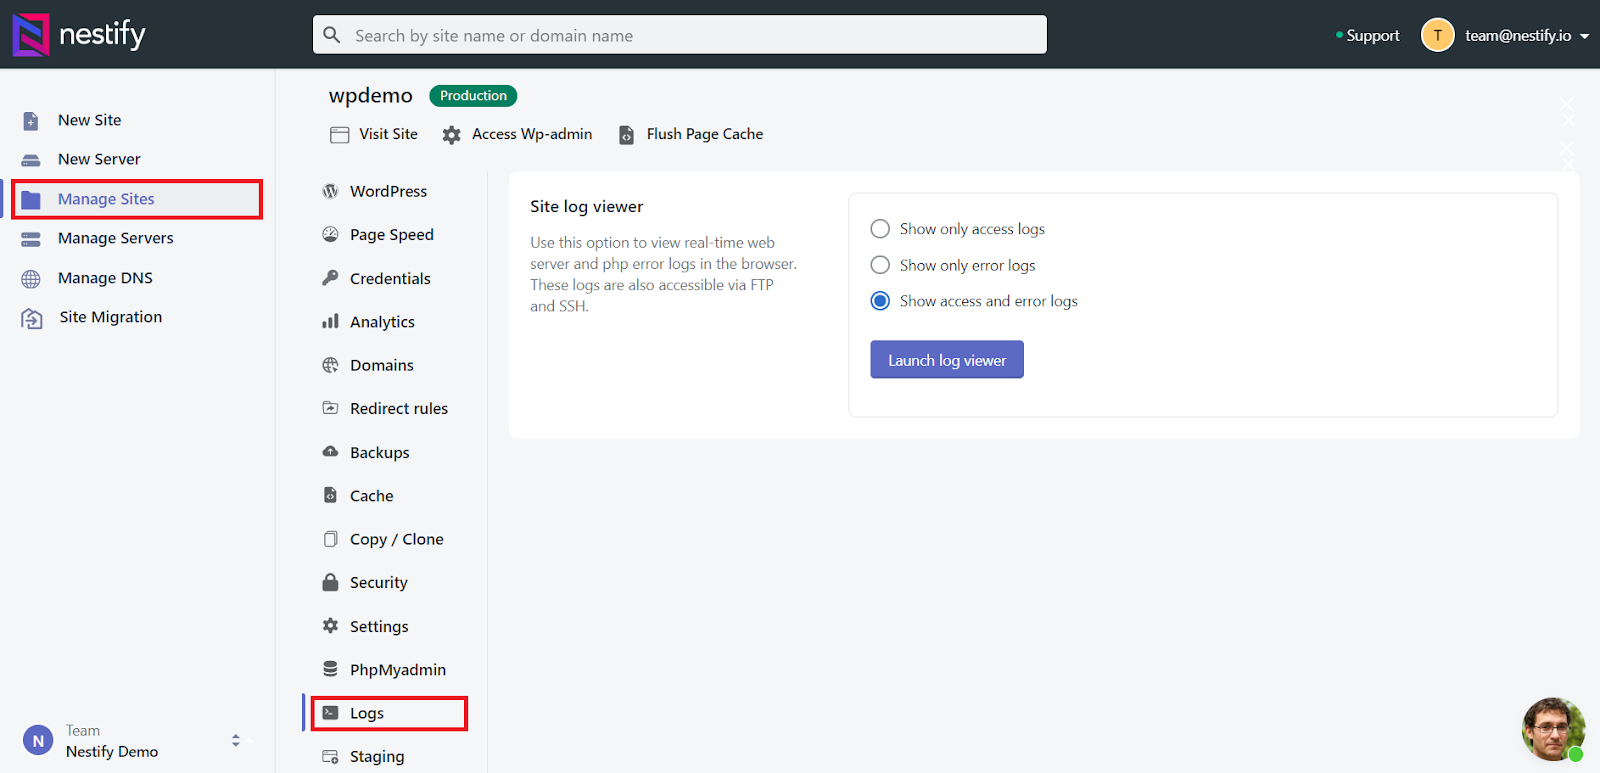
Launch Log viewer
Steps:
1. In the production site, click Logs, below phpMyAdmin.
2. It displays the log details on the right pane.
3. Select the requisite option among
• Show only access logs
• Show only error logs
• Show access and error logs
4. Click Launch log viewer.
5. It redirects you to another page and displays the logs.
It displays the logs information.